Showing posts with label bone cleaning. Show all posts

Wednesday, May 24, 2017

Get Help on Facebook: Bone Collecting & Processing Groups

Hello! I apologize for turning off commenting here and never answering some questions. I had way more questions coming in than I will ever have time to fully answer. Plus it is hard to really help you guys here without seeing your photos. So I’m redirecting you to a much better format to help you out - my Facebook groups.

If you did not already know - I’m a full time natural history artist and pet aftercare specialist. Which are my only means of income. My shop is Bonelust.Etsy.Com

I have an overwhelming amount of Pet Memorial Services I’ve taken on. And also find and process most of my own supplies, which is very time consuming.

All while answering countless bone processing, bone ID and art related questions daily at Instagram, Tumblr, Etsy, Flickr & especially Facebook. If you want help with processing or identification I highly suggest you join the related groups below. Even if I am personally too busy to answer your questions one-on-one, there are still a lot of very helpful and experienced members in my groups.

August 2020 Update - My Facebook groups have been around the longest & with the most members, on these topics:

Worldwide members, natural history group: For processing help, identification help, and to show off collections. There is a main focus on bones but it is open to all things natural history. - Skull Collecting

Worldwide members, natural history art group: For artists to share/sell the art, taxidermy & jewelry THEY made from animal by-products and for others to buy. Related drawings, paintings, digital art and photos are also OK. - Bone & Taxidermy, Art & Jewelry


I have more groups but those are the two main groups and from there I can redirect members to more specific groups. Request to join and once I approve you you can start interacting. PLEASE allow me some time to review your FB profile to make sure you are not a bot. I run many groups with over 100K combined members. Sometimes it could take some time before you are added so I appreciate your patience, thanks and see you there!

In the meantime, if you need bone processing help I suggest redirecting to this blog post of mine - 
BONELUST BLOG QUICK LINKS - Answers For Your Bone Processing Questions Are Her 

Friday, May 15, 2015

BONELUST Q&A: "I've been macerating bones & they are now a strange color! Are they ruined?"

Maceration is the process of purification to remove the remaining flesh from bone. It is the easiest & least expensive way to do this while still leaving bones in good condition. Note that this process is typically best for animals larger than a rat. Smaller bones can turn to mush during maceration as they themselves start to break down.

To macerate you take your animal remains that have very minimal flesh on them (never a whole animal!), add them to a plastic container & fill with plain tap water then replace the tight fitted lid. The lid is important because you don't want insect larvae in your maceration water only the bacteria that will grow and eat away the flesh. You also don't want to leave it out in the rain without a lid or you'll get algae growing. Insect larvae & algae with both start to break down and possibly even stain the bone.

The more flesh on the remains the longer this process will take. Somewhere around 2 weeks the bones should be coated with a film that's pink, red, rust, brown or black. That's normal & means the bacteria is working to remove the flesh. The bacteria may however be dead now though so time to change the water if still fleshy and start the process again, or time to start peroxide bath if done. Pour out only half on the nasty water and add fresh water to fill the rest of the container if the maceration is not done yet.


These deer bones were covered with a bright red film because they were left for too long in the maceration process, on accident. They were completely flesh free though. Thankfully I just hosed the film right off then started the peroxide step to get rid of the awful smell.

The odd colored film you see on your bones is a residue of the bacteria or the bacteria itself coating the bone. It does this when the water runs out of oxygen for the bacteria to survive. Referred to as the bacteria going anaerobic. This anaerobic bacteria in maceration replaces the microbes that were doing the maceration work of defleshing the bones. And therefore the maceration process has come to a halt.

It can be caused by too many microbes using up all of the oxygen in the water or it can be from an oily film on top of the water that keeps oxygen from entering the water. Some ways to prevent this are - larger quantities of water, changing the water or a bubbler. It commonly happens to marine mammal remains during maceration because of the high oil content in their bones rising to the top of the water.


This is a potbelly pig skull that started off lightly mummified that soaked undisturbed for 2 weeks. The maceration water was still fairly clear and yet the skull was turning black. I've found that when there is little flesh to work with or very old flesh this can happen. Sometimes the black film easily hoses off or goes away once the bone dries. In this case though it took a peroxide bath to remove the black coloration. 


Raccoon bone that was pulled out of maceration. It was dropped into peroxide and pulled out an hour later to show how fast the peroxide can get rid of the staining. It can in most cases happen instantly.


"Before" of diamondback rattlesnake bones straight out of maceration.


"After" of same diamondback rattlesnake bones after a peroxide bath.

The maceration water needs to be kept at a certain temp to work. It will not work in the Winter in most locations because it is too cold for the bacteria to survive. It will also die off if it gets too hot in warmer months. For exact temperatures & more extensive info about this see this blogspot blog.

Good luck!

Friday, September 20, 2013

BONELUST Q&A: "Do you use dermestid beetles?"

BONELUST Q&A: "Do you use dermestid beetles." Carrion insects have always been a part of my bone processing but I've never had a captive colony of any kind. For a while I had a wild colony of dermestid beetles/larvae helping me clean. I posted photos of t

Carrion insects have always been a part of my bone processing but I’ve never had a captive colony of any kind. For a while I had a wild colony of dermestid beetles/larvae helping me clean. As long as I supplied them with new food they stuck around. But I’ve not yet had a captive colony. Ever since that episode of Oddities with the dermestid beetles in a NY apartment I constantly see beginner collectors talking about getting them to clean bones & it makes me cringe.

Looking Good In Dermestid Beetle Bone Cleaning World

Sorry but I don't agree that the best way to remove flesh from bones of an animal carcass is by using dermestid beetles. Many that suggests them too frequently neglect to also mention their care, upkeep and not to mention that while dermestid cleaned bones are beautifully flesh free they are also usually absolutely grease saturated. A step that's often completely skipped by me is degreasing because my maceration process often takes care of it. And to be honest I abhor bone degreasing. It is VERY time consuming and tedious. I'm also quite confused how the Oddities episode skips degreasing completely and goes straight from beetle defleshing to the Hydrogen Peroxide bath. As a longtime experienced bone collector/processor I know that scene must be missing or you'll end up with a grease saturated skull in most cases. Wanted to note that I actually do know Ryan and Monique that were in that episode, so I'm by far giving anyone hell... just wanted to point out some important factual things about bone processing and dermestid beetles that I feel were not mentioned in that episode of Oddities.

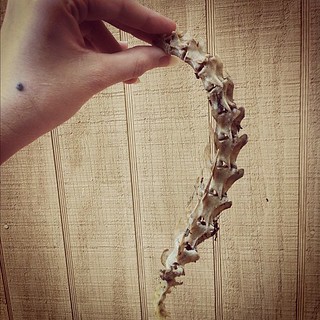
Wild Dermestid Beetle Cleaned Spine
I still had to macerate this spine after dermestid defleshing because the cartilage was still between the vertebrae.

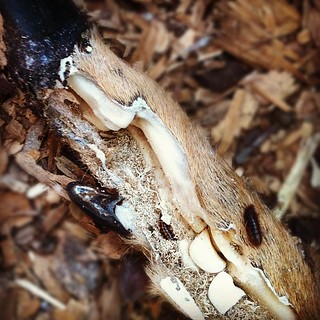
Wild Dermestid Beetle Larva Working Their Magic Exposing the Clean White Bone In A Deer Leg

Care and upkeep of these beetles is far harder than people realize. I can’t recommend against it more if you are a beginner bone collector. Unless you actually need them for smaller animals & have a constant food supply for them, and are REALLY good at pet care I don’t ever suggest them to anyone. Plus, the maceration process is so easy & inexpensive in comparison. You literally need reg tap water, a tight lidded plastic container & patience.

So Excited To Have Just Found My Wild Dermestid Beetle Colony Back On Their Own & Looking Really Healthy!

Dermestid beetle care is far more complicated. They need very specific maintained temperatures, humidity, have to keep them free of parasitic mites, have to keep predators from them like spiders, need food/water, proper bedding, lighting, ventilation and enclosure... and so much more. I am currently working on setting up my first captive colony but only after a LOT of online research, talking to friends that successfully have healthy colonies & even located an out-of-print book on the topic. And I’m still not sure if I will be able to keep them alive but I will give it my best shot. The thought of them dying because I can’t properly care for them kills me. So I’ve prepared for this for literally years. Not haphazardly bought a starter colony online at a whim. If I'm successful I will post a followup blog.

Dermestid Beetle Larva Cleaning A Paw

There is a great misconception that feeding them alone is enough. Just drop a fleshy skull into your enclosure and you’re done. Or that cleaning bone is super fast and easy with a colony. Far from the truth. It takes a colony of literally 1000s of adults/larvae to even clean a med sized animal head. The larvae actually do most of the work but you need the adults to make more larvae

Why Buy a Colony of Flesh Eating Dermestid Beetles When You Can Get Them For Free?

So this was just a little PSA to REALLY do your research. They need care just like any other kind of pet. Also, if they get loose in your home they can eat a whole lot of other things in every common household besides dried flesh. I've actually lost a lot of my personal collections in the past of smaller bones and insects to wild colonies invading my home. And yes, adults can fly. So you’ve been warned! haha

For more info on the topics discussed here clink on the links in the post to go to my related extensive posts.

Saturday, September 14, 2013

"Stick it on an ant pile!"

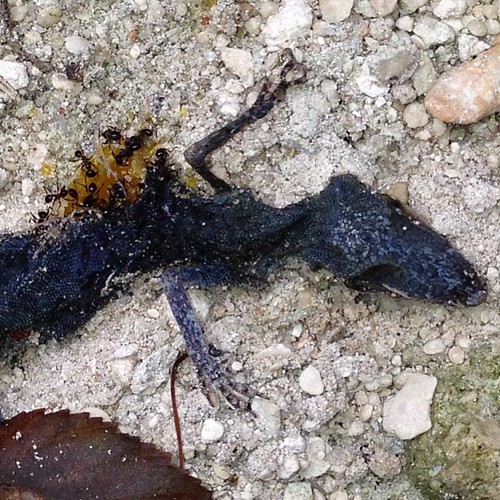
I've heard that countless times in reply to "How do I clean these bones/dead animal?" This anole here is literally the 3rd dead animal in 12 years living at my current location that I've seen with any ants feasting on. And there have been a LOT of dead things for ants to eat on my property over the years. I don't have any piles on my property at all. Too swampy here. So I usually see them out on the well drained and dry dirt road like this.

"Stick it on an ant pile!" I've heard that countless times in reply to "How do I clean these bones/dead animal?" This anole here is literally the 3rd dead animal in 12 years living here that I've seen any ants feasting on.

This is a perfect example of how there are so many deciding factors involved in the steps to process a dead animal. A major one being your location. I simply do not have any of the ant species where I currently am that will help remove the flesh from dead animals. So that option is out for me.

Also, the first and last time I ever tried using ants to help me clean remains over 15 years ago, most of my pet snake was taken underground vertebra by vertebra and rib by rib. I even had it in a cage on top of a screen. So it ruined that whole option for me. I really like having much more control of my bone processing.

I understand though that this may work for other people. I've met people swear by it and that's great. But it isn't something that will work for everyone

Wednesday, June 5, 2013

Whitening Bone Using Hydrogen Peroxide NOT Chlorine Bleach

BONELUST BONE PROCESSING PROGRESS: Cat Skull finished (mandible still in maceration). Note, cat only had incisor roots remaining. Front view.

I recently edited my Bad Words: BOIL & BLEACH post here adding much more extensive info about using hydrogen peroxide (H2O2). Posting it as a new blog with even more info and photos so you guys don't miss this important info.
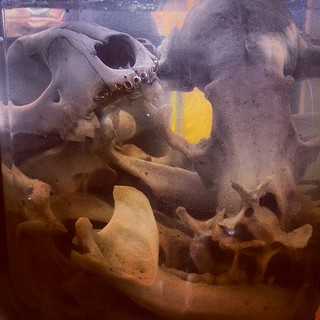
BONELUST BONE PROCESSING PROGRESS: View Of Raccoon Skulls & Bones Recently Posted Here In Peroxide Bath. They Are Cleaning Up Nicely.
In the H2O2 bath.

ON THE DRYING RACK: Always Seem To Have Every Step Of Bone Processing Going On Here At All Times - Learn More At My Blog Bone-Lust.Blogspot.Com
Drying after the H2O2 bath.

NEVER use chlorine bleach on bones.

Chlorine based bleach permanently damages the bone itself. It will start to break down the structure of the bone and will continue to even after it is rinsed and dried. Resulting in chalky, fragile and extremely porous bone that will turn to bone meal with age. Not to mention it turns the bone yellow. Which pretty much defeats the purpose if you are trying to whiten the bone. It may appear white at first but will turn yellow. Once it yellows from bleach there is nothing you can do about it. Believe me, I've tried to salvage yellow bleached skulls before to no avail.

Bone Collectors Gold: I enjoy quickly 
changing the topic every time I buy a mass quality of Hydrogen Peroxide.
 Most people wouldn't appreciate the truth. Finding this much all at 
once isn't easy around here.

To sanitize and whiten bone use regular household hydrogen peroxide (H2O2) that you can easily and inexpensively get ahold of at the grocery store, dollar store or drugstore. Do a 50/50 bath with water just above the bones in a loose lidded plastic container to reduce evaporation. Oxygen activates the peroxide so you want to let air get to it. But it will evaporate so keep an eye on it and top it off as needed. Also, if you have a tight lid on it pressure may build up and the top literally blows off.
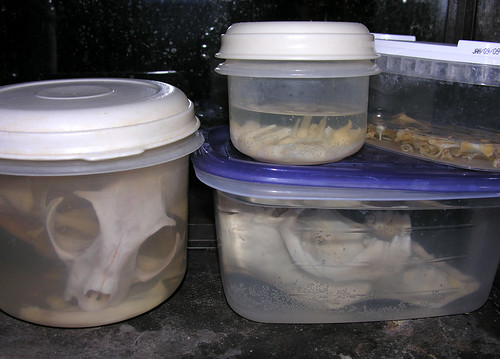
BONELUST - Skulls, Bones & Teeth 
in Hydrogen Peroxide Baths
Lids are loose to let oxygen in and pressure out.

How long? Just keep the bones in this bath until they are the color you want them. This is a personal preference. Note that the bone will dry lighter than it looks wet. This process can take days or weeks. Although if you leave it too long it will eventually make the bone brittle. But this usually would take months for medium sized bones like say of a raccoon. This is a very safe process for most bones if you properly follow my steps. When done whitening, rinse the bones in water then lay out to dry in the sun on towels or dry inside with a fan on. I put towels or paper towels under the bones to help pull moisture out. Be sure the bones are dry before you put them in a sealed container for storage or they may mold.

Just my usual day. Cleaning & 
sorting bones for Bone Lust projects.
Sun drying bones.

More About Mold

These were bright white cleaned bones. I thought I had left them out to dry long enough but apparently hadn't. I bagged them up in a ziploc and put them in my supply drawer. Only to find some time later that the had become splotched with black mold through the bone core and on the outside. I soaked them for weeks in full strength hydrogen peroxide but they only got this white again. In the closeup on top you can see the actual mold inside the bone. I think the molding also had to do with the bone needing to be degreased more. The mold spread to all bones in the batch though. Those not needing degreasing as well.
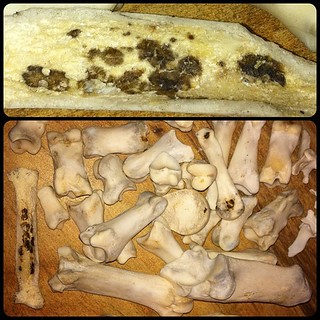
Problems With Bone Processing: Molded 
Bones

These bones had been cleaned and dried but got humid and grew a green fuzzy mold on them. Luckily I just hosed them off and gave them a H2O2 bath and they cleaned up beautifully. So this is a reminder to store bones in a dry place.
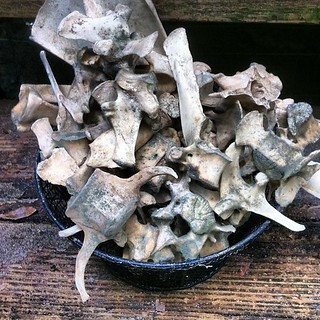
The Hazards Of Bone Processing In The Humid South: Moldy Bones - These Deer & Wild Boar Bones Were Already Cleaned & Stored On My Porch - All The Rain Lately Made Them Mold

Important factors: If your H2O2 bath gets really cloudy you likely need to dump it out and start a new bath. Otherwise it will start to macerate instead. Do not use a metal container with H2O2. Use plastic or glass. Store in a cool dark place. Direct sunlight will eventually deactivate H2O2 that's why it comes in dark containers. Do not do this step outside with no lid. You will just end up with deactivated H2O2, algae and insect larvae all over you bones and you'll have to start over... or the bones may be ruined.

Nearly Done: Peroxide Bathing Deer Skull 
& Jaws
Bubbles is a good sign your H2O2 is still active.

DO NOT use hair developer type peroxide on bones, ever.

There are additional ingredients in it besides H2O2 and it is MUCH stronger than regular corner store purchased H2O2. Which I think is only 3%. I have experimented with this myself and the developer turned huge deer vertebrae to literally mush in my hands. Likewise, do not use the powdered hair bleach packets. The same results will happen. So you've been warned!
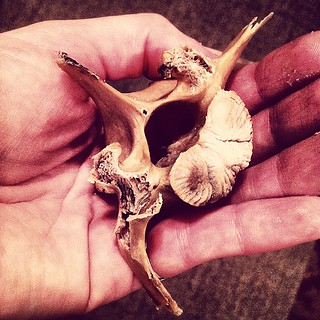
Bone Processing No-No: This Is Why You NEVER Boil Bones To Clean Them. This Normally Very Thick & Strong Boar Vertebrae Literally Turned To Mush After 2 Days In Very Low Heated Water. Imagine What Damage  A Full Boil Could Do In A Matter Of Hours. I Crush
Improperly processed vertebrae that turned to mush in my hands.

Algae & Moss Covered Nature Cleaned Bones

Note that some staining will not come out especially if bones were decaying on the forest floor for some time. Remember, you want to be sure the bones have already been degreased and cleaned of all flesh/dirt/etc before putting into the peroxide.
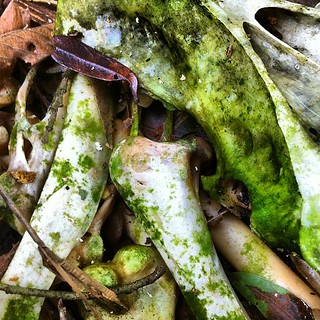
This Is What Happens To Bones Left Outside For Too Long: Might Leave Some Of These Wild Turkey Bones This Way For My Art

Too late to clean and whiten these bones. After bones have been left in the elements for some time they begin to break down. These bones are now "living" again covered with algae/fungi that is eating it. This is one reason I choose not to do the bury method. If you wait too long bones have already begun to decay. I like processing methods where I can see what is happening to the remains at all times.
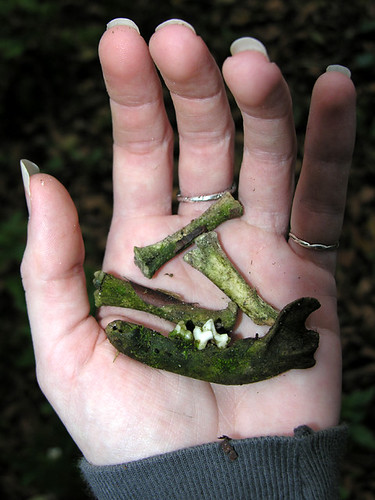
BONELUST - Old Bone Box Growth/Rot on Misc Animal Bones (Macro)

BONE PROCESSING BLOG POST WITH TIMELINE:

BONELUST BONE PROCESSING PROGRESS: First Adult Goat Skull processing progression photos & timeline.

See the post that goes along with the above photo here -  BONELUST BONE PROCESSING PROGRESS: First Adult Goat Skull processing progression photos & timeline.

For even more extensive info about all the steps I use in processing bones check out the rest of my blog. Enjoy!

Sunday, May 5, 2013

BONELUST BONE PROCESSING Q&A: I want to start collecting bones/animal remains but I'm concerned about disease.

Excited About My New Respirator Filters & Getting My High Quality Gloves Again. Otherwise Even I Couldn't Have Dealt With The Nastiness I Did Today. Didn't Smell A Thing & No Need To Double Up Gloves!
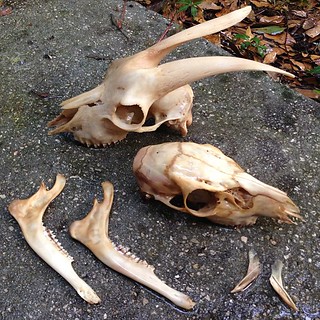
What sort of safety precautions do you take while removing flesh from bone?

Good questions that I think not enough beginning bone collectors think about. Well obviously be super sanitary about each step of it. Here are some steps I take to stay sanitary:

Wear a respirator or at least a surgical/dust mask when you have concerns about airborne disease. I always wear high quality well fitted latex gloves when handling any remains until they are completely sanitary AFTER the hydrogen peroxide bath, which is the final step of processing. You can get every size imaginable in boxes of 100 on Amazon.com. You don't want cheap gloves tearing open while you're handling rotting carcasses. If you only have cheap gloves, double up.

Take care not to do processing where you eat or bathe. Every time I see a photo of a skull in a bathroom sink with their toothbrush and glass nearby I cringe. Keep your processing tools separate from your kitchen tools AND wash separate. Yes, these things would seem like common sense but I've seen bone collectors do things you wouldn't believe. Also, do not let your pets drink maceration water, peroxide bath or chew on dead things. I've seen far too many photos where people think this is funny. It can be VERY bad for your pets to do any of these things. Would you let your child drink/chew on these things???

Also, wash your hands/arms, hair and clothes/shoes after possible contamination. After I've gotten myself into some REALLY nasty stuff I put my clothes (shoes included, I wear Chucks so I can) into the wash and take a shower myself. When you're working on maceration tubs or handling dead animals you can expect a certain amount of contamination of your clothes/shoes. Splashback from maceration baths is very common. If you have long hair like me, take care to pull it back and keep it out of the nastiness. Likewise, wash down your processing work area and maceration tubs after use. The only time I use chlorine bleach in relation to bone processing is when I clean out maceration tubs when they get really bad. Although most of the time I let everything sun sanitize. Because I don't want bleach killing off my maceration bacteria colonies. So if you do use bleach rinse VERY well.

When picking up dead animals to process watch out for gases and liquids escaping the body. Which will almost always happen when you move the body. If you don't have latex gloves with you use a plastic bag to handle it and flip it right into that same bag. Don't lay dead animals in your car without a plastic bag or you'll be sorry. That smell will stay around and leave a very unsanitary stain where it laid. Keep hand sanitizer, gloves, and bags in your car so you're always prepared.

I could go on but that covers the basics and a little extra, just use common sense. Stay safe and sanitary friends.

Saturday, May 4, 2013

Most Important Thing For a Bone Collector? Patience.

One of the main things I see most bone collectors struggling with is having the patience to get the job done right. Right meaning using steps that leave the bone strongest as a finished piece. Processing from start to finish for me can take weeks or even months per skeleton/skull. Start being a dead animal, finished being only the bone/horn/hoof/claw/antlers.

The way I get around being impatient is to always have several projects going on at all times in every step of my bone processing.

1) Natural decomposition and/or maceration.

Deer Remains I Got Oddly Enough, In The Mail

Naturally decomping deer remains, nearly ready for maceration.

BONELUST BONE GIFT: My father brought me 
this great opossum skull. I dropped it right into a maceration tub I 
already had going for an opossum skeleton. When the flesh/fur is this 
dried on it is ok to macerate as is. You'd do more damage to the skull 
tryi
Naturally mummified opossum skull ready to macerate.

BONELUST - Maceration Bucket Refreshing: Deer, Wild Boar & Cattle Bones
Filling up a maceration tub of deer and wild boar bones with water.

Deer Bones Rinsed Beautifully After Maceration Process Of Bone Cleaning: Detailed HowTo Posts At My Bone Collecting Blog Bone-Lust.Blogspot.Com
Flesh free bones after maceration.

Bone Processing Time: Checking On My Maceration & Degreasing Tubs. From Extra Nasty To Almost Clean. Want To Learn More? Check Out My Blog Bone-Lust.Blogspot.Com
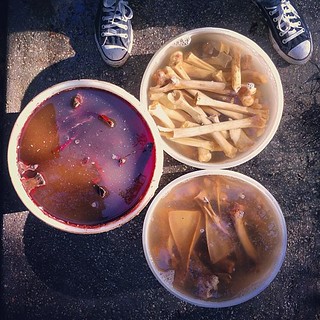
Wild boar and deer bones in different stages of maceration and degreasing.

2) Degreasing.

I honestly don't do a lot of degreasing. I've found that a lot of the oils rise to the surface during maceration. On a rare ocassion I do some extra degreasing though with a dishsoap and water soak. Or super weak ammonia and water soak. Both can take months. Also degreasing is really a personal preference of the bone collector. Some people don't care to degrease at all and some like their bones grease free.

3) Hydrogen peroxide (H2O2) bath.

BONELUST BONE PROCESSING PROGRESS: Ran Out Of Containers For Peroxide Baths So 2 Front Wild Boar Skulls Are From The Last 2 Days. You Can See That The 2 In Containers In The Back Are Already Lighter. I Have One Left To Degrease Tomorrow.
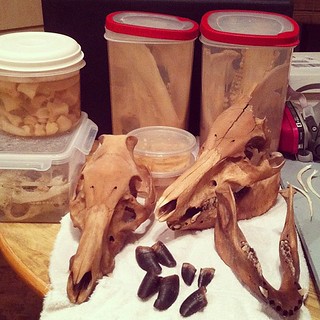
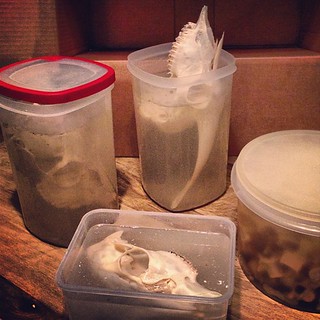
Wild boar bones and skulls in different stages of peroxide bath sanitizing and whitening.

Right now I have these skulls/bones in their final H2O2 bath. Deer skulls, goat skull & wild boar vertebrae. One deer skull is on the side to further lighten a stain. The goat skull was too big for the container so once the skull lightened it was time to do the same to the horns (minus the horn sheaths).


BONELUST BONE PROCESSING PROGRESS: Right now I have these skulls/bones in their final H2O2 bath. Deer skulls, goat skull & wild boar vertebrae. One deer skull is on the side to further lighten a stain. The goat skull was too big for the container so once

4) Drying.

BONELUST BONE PROCESSING PROGRESS: Taking advantage of another beautiful sunny day & laid out a huge batch of deer & wild boar bones to dry yesterday. They always look better once the are dried. These were all hunter dumped.
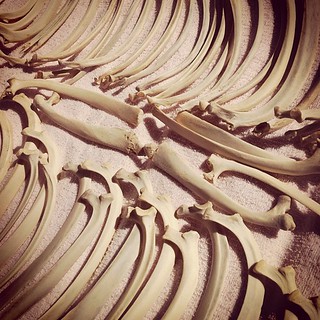
Deer and boar bones sun drying.

BONELUST BONE PROCESSING PROGRESS: First Adult Goat Skull is complete. This will be a keeper for my personal collection.
Finished skull example of a goat.

Want more detailed info on each step? There are extensive blog posts covering each of these steps pictured here. For more info read the rest of my related blog posts.

Maceration Info

Bad Words: BOIL & BLEACH

The Mathematics Of Maceration - A HowTo Guide For The Impatient

BONELUST BONE PROCESSING Q&A: What should the remains look like to begin maceration?

Degreasing Info

BONELUST Q&A: "How will I know if a skull needs degreasing, I'm not sure what it even looks like?"

Whitening Info

Whitening Bone Using Hydrogen Peroxide NOT Chlorine Bleach

Bad Words: BOIL & BLEACH


Sunday, April 28, 2013

BONELUST BONE PROCESSING PROGRESS: First Adult Goat Skull processing progression photos & timeline.

BONELUST BONE PROCESSING PROGRESS: First Adult Goat Skull processing progression photos & timeline.

1) As it started in early March, horn sheaths removed. Added to maceration tub. Some minor flesh and grease present.

BONELUST BONE PROCESSING PROGRESS: See you in a few weeks my beautiful new goat friend. Bath time!

2) Removed from maceration and rinsed, mid April. Had been dumped and refilled once with water.

BONELUST BONE PROCESSING PROGRESS: This goat skull & deer skull/mandible cleaned up nicely after a few weeks in maceration tubs. The deer unfortunately is a bit fragile & coming apart. I think it is because it is a juvenile or struck on the snout by a car

3) Started hydrogen peroxide bath mid April. No grease present or flesh. Only some bone staining.

BONELUST BONE PROCESSING PROGRESS: Right now I have these skulls/bones in their final H2O2 bath. Deer skulls, goat skull & wild boar vertebrae. One deer skull is on the side to further lighten a stain. The goat skull was too big for the container so once

4) Done and horn sheaths replaced late April. Turned out gorgeous.

BONELUST BONE PROCESSING PROGRESS: First Adult Goat Skull is complete. This will be a keeper for my personal collection.

RELATED BLOG POSTS:

Bad Words: BOIL & BLEACH

The Mathematics Of Maceration - A HowTo Guide For The Impatient

Whitening Bone Using Hydrogen Peroxide NOT Chlorine Bleach